Published 8 April 2025 revised.
Only Dialpad Admins can provision Yealink deskphones against a User or Room Phone license.
Before doing the SIP Configuration, it's important to request sip_phones to be added to your account. Request from support@untangled.com.au
This procedure is for Yealink T3, T4, or T5-series desk phones:
- whose front display shows anything except Dialpad Activate, or
- when auto prov does not work
This procedure also applies to new Yealink or Poly cordless phones that need to be configured to a Dialpad user or room license.
Preparation Checklist:
-
Power Source: Ensure the phone is connected to a power source (via adapter or PoE - Power over Ethernet connected from the deskphone internet port to your router. A PoE powers up your Yealink deskphone too).
-
Network Connection: Connect the phone to the same network as your desktop as this is needed to be able to access the deskphone GUI or log in page.
-
IP Address: Find the phone’s IP address via Menu > Status or pressing OK when idle.
-
Admin Credentials: Have the admin login (default: admin/admin) for the web interface.
-
SIP Server Info: Get SIP account details from Untangled. This is your username, password, and server information.
-
Web Browser Access: Use a browser to access the deskphone’s GUI for configuration.
- AnyDesk app: Download via anydesk.com/download so our support team can do all the work by remote accessing your computer
Factory Reset: To configure a Yealink T series deskphone previously set up with a different provider, a factory reset must be performed first.
Steps:
1. Factory Reset Yealink Deskphone
2. Yealink Deskphone SIP Configuration
Factory Reset Steps
To perform a factory reset on a Yealink T41S phone via the GUI:
1. Access the Web Interface
- Find the IP address of the phone by pressing the "OK" key when idle or navigating to Menu > Status.
- Enter the IP address into a web browser.
2. Log In
- Use the default username: admin and password: admin.
3. Navigate to Reset Settings
- Go to Settings > Advanced Settings.
- Select Reset Config and then choose Reset to Factory Settings.
- The phone will prompt for confirmation.
- Click OK or Confirm to proceed.
5. Wait for the Reset Process
- The phone will reboot and reset to factory settings.
- Do not power off the phone during the reboot process.
Yealink Deskphone SIP Configuration
1. Enable sip_phone SKU on user's profile.
2. Go to https://dialpad.com/office/phones
- Click on Add a User Phone
- Click on SIP Phone
- Type in the name for the deskphone
- Search for user's profile

- Click on next then click on Need a shorter username
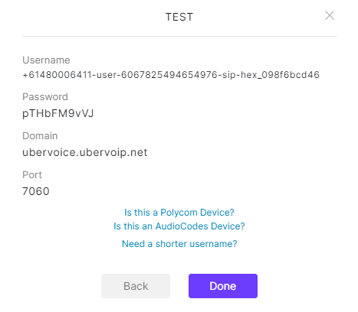
- Copy the generated details on to a notepad
3. On the physical desk phone, go to Menu and Status and take note of the IPv4.
4. Open up a browser and type in the IP address of the Yealink phone.

5. Type in the default Username (admin) and Password (admin).
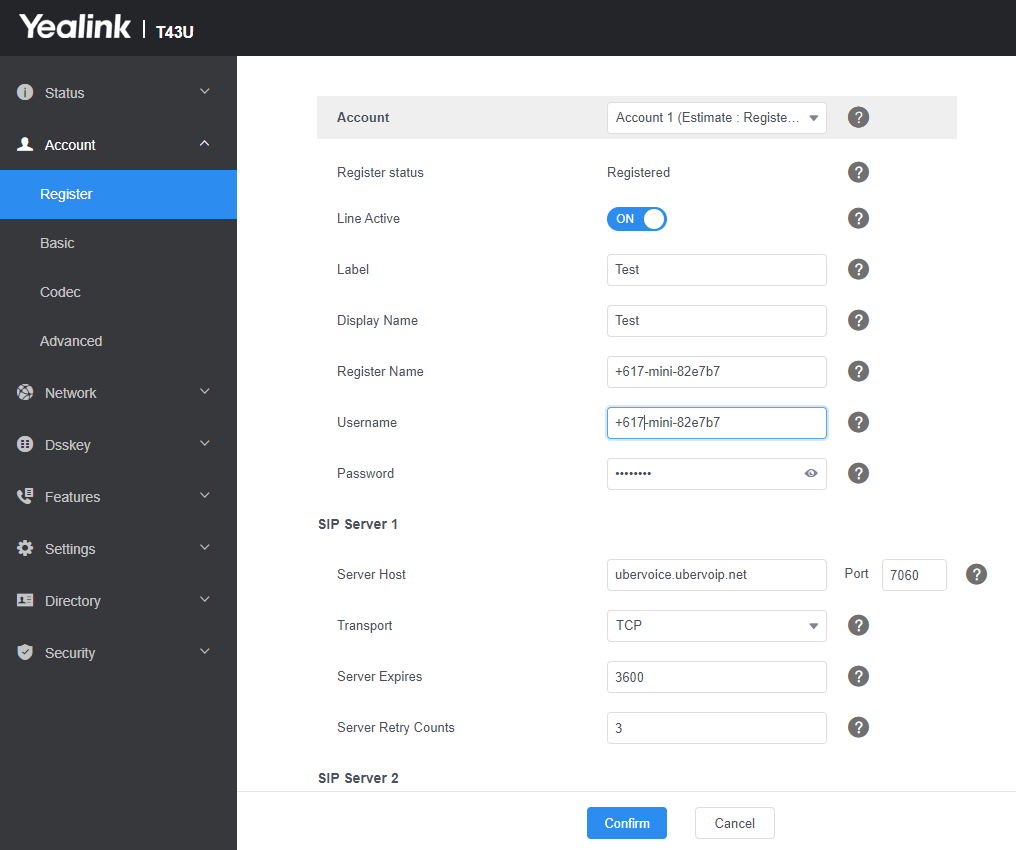
6. Register Account 1
- Click on Account > Register
- Enable Line Active: ON
- Label: Put in a display name
- Display Name: Same as Label
- Register Name: Paste the username from the notepad
- Username: Same as Register Name
- Password: Paste the password from the notepad
- SIP Server Host 1
- Server Host: ubervoice.ubervoip.net
- Transport: TCP
- Port:7060
- Click Confirm
- Outbound IP should be DISABLED
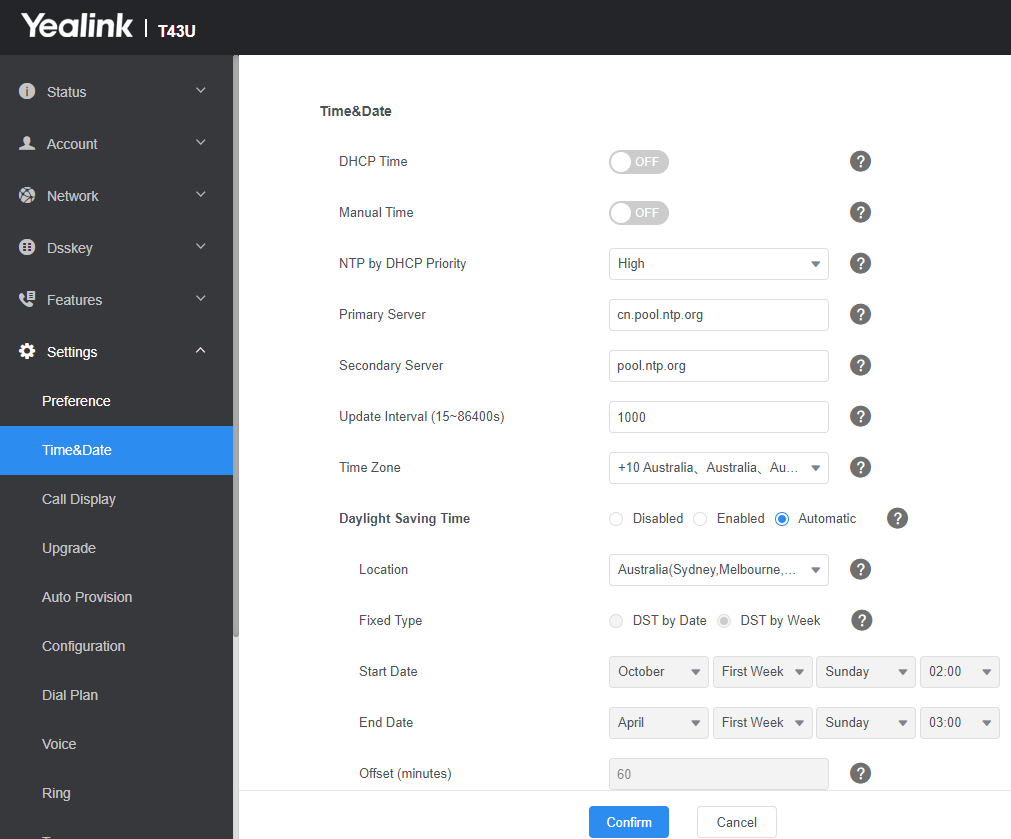
7. Change Time Zone
- Settings > Time & Date
- Time Zone: Set to +10 Australia
- Daylight Saving Time: Set to Automatic
- Location: Australia (Sydney, Melbourne)
- Click Confirm
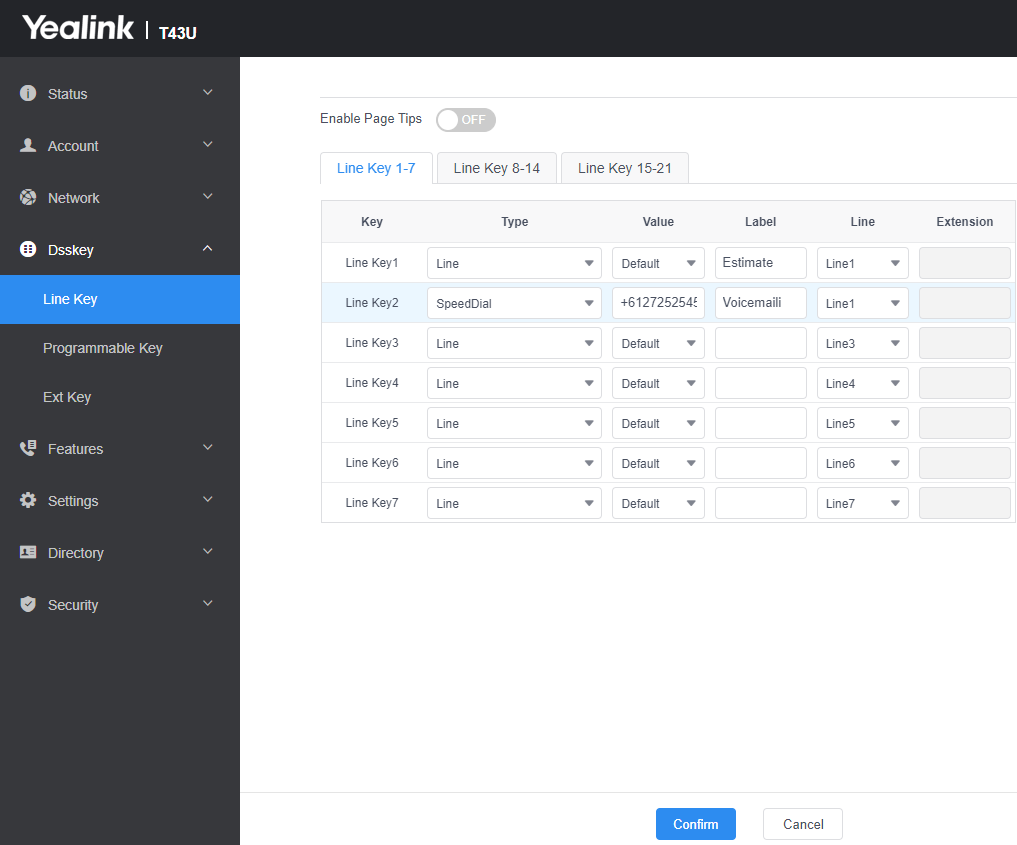
8. Set Voicemail
- Dsskey > Line Key
- Under Line Key 2
- Type: SpeedDial
- Value: Enter your phone number (DID)
- Label: Voicemail
- Click Confirm
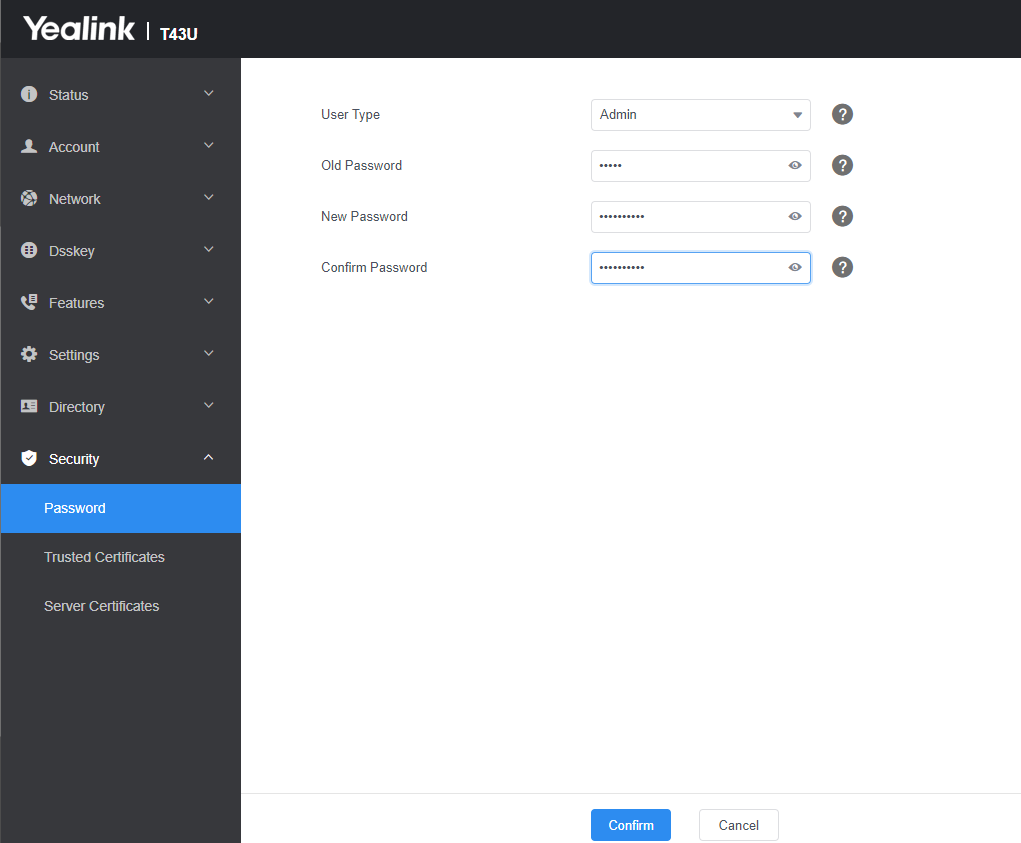
9. Set Admin Password (optional)
- Security > Password
- Old Password: admin
- New Password: qwe!@#123
- Confirm Password: qwe!@#123
- Click Confirm
Still having problems?
Call or text our support team on 0480 006 410, alternatively you can raise a ticket to support@untangled.com.au